Bed Mesh
The Bed Mesh feature provides an interactive 3D visualization of your print bed surface. Use it to calibrate, manage, and compare bed mesh profiles, helping you diagnose leveling issues and ensure optimal first layer adhesion.
To open the Bed Mesh interface, click on HEIGHTMAP in the navigation bar:
Klipper Config
This option will only appear after Bed Mesh has been properly configured in Klipper. For setup instructions and additional details, refer to the Klipper documentation
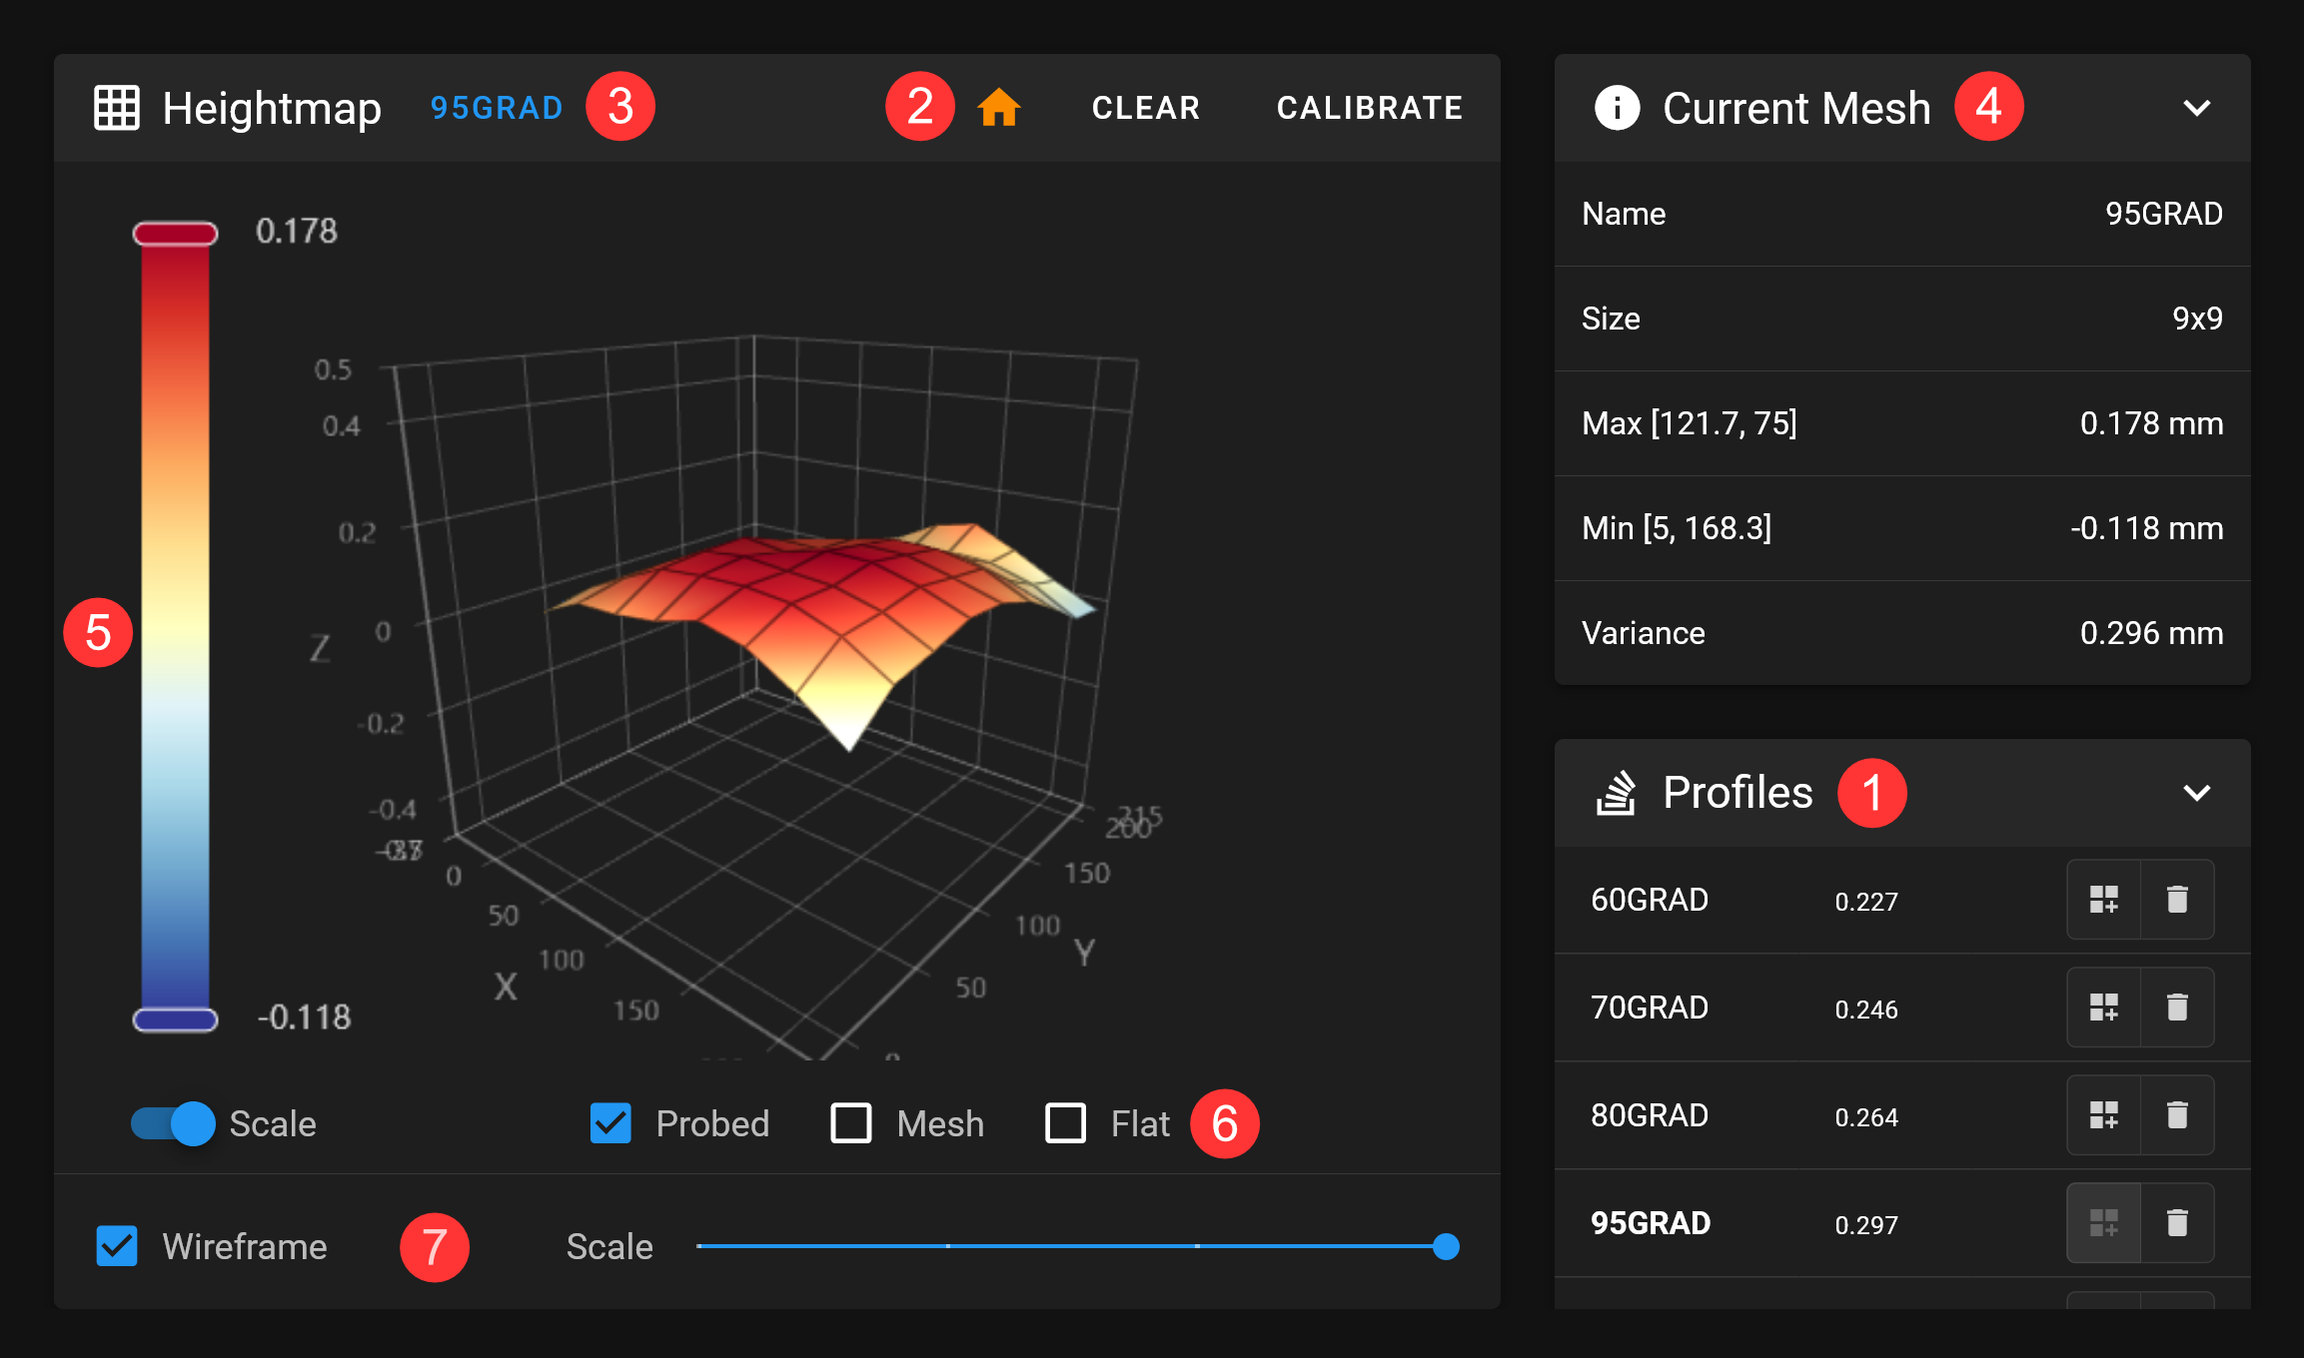
The image below shows the Bed Mesh interface with numbered annotations:
-
This panel lists your Bed Mesh profiles. Klipper allows you to create multiple profiles, which you can select or delete here. Next to each profile name, you'll see the variance — the difference between the highest and lowest measurement points.
-
Create new profiles by performing a calibration using the
CALIBRATEbutton in the title bar. From there, you can also home your printer and clear the currently loaded mesh. Don’t forget to save your changes—after calibration, aSave Configbutton will appear in the header. -
Click on the profile name to rename the currently loaded mesh.
-
The
Current Meshpanel displays key details of the loaded mesh, including its name, size, min and max values, as well as the variance. -
You can adjust the scale by moving the sliders up or down. Additionally, use the toggle switch to restrict the scale to the profile’s minimum and maximum values.
-
You can display the probed mesh, the computed mesh, or a flat plane at Z=0.
-
Use the slider at the bottom to scale the mesh, making height differences easier to see. There’s also a switch to toggle the wireframe view.