First Boot
Learn how to set up MainsailOS after flashing it to your SD card. This guide covers the first boot, accessing Mainsail, and essential configurations for your 3D printer.
Initial Boot
After MainsailOS has been successfully written to the SD card, insert the card into your device. Connect any necessary peripherals such as network cable, webcam(s), and the USB cable(s) to your 3D printer. Then power on the device and let it boot up.
The first start of MainsailOS will take some time to expand the file system. The larger the SD card, the longer this initial process will take.
Raspberry Pi
The green LED indicates SD card activity. Once it only flashes occasionally, the process should be complete.
Be Patient
This process can take up to 5 minutes on slower models such as the Pi Zero 2 and Pi 3 series.
Access Web Interface (Mainsail)
After the boot process has finished, Mainsail will be available at http://mainsailos.local or http://mainsailos. You
may need to replace mainsailos with the hostname you chose while flashing the image.
Tip
If accessing Mainsail using the hostname fails, try connecting to the device's IP address directly. You can look it up in your router's admin interface if it is not known.
Update Manager
To find the Update Manager, select Machine in the sidebar navigation. The Update Manager is displayed at the bottom-right of the Machine page.
When you open the Update Manager for the first time, it may show that some components have updates available.
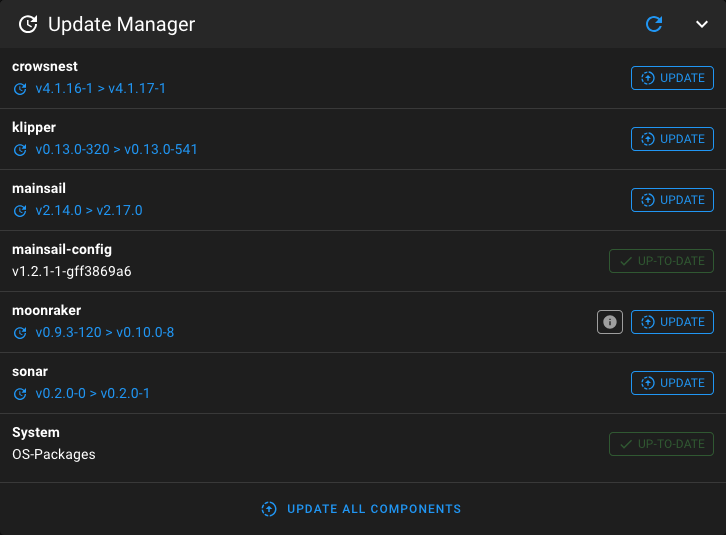
Click Update all components to update everything to the latest version and wait until the installation is complete. See the Update Manager documentation for detailed information.
Keep Your System Up to Date
We recommend updating all components before you start using your printer. Even though we regularly release new versions of MainsailOS, we cannot guarantee that all components (System, Klipper, Moonraker, Mainsail, Crowsnest) are up to date at the time of install.
Klipper Configuration
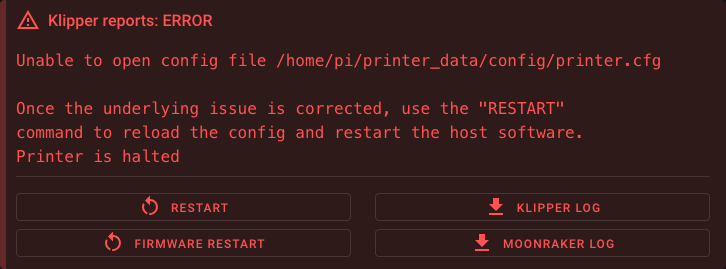
MainsailOS is a generic image for all Klipper printers. It does not include any Klipper config file (printer.cfg).
With no printer.cfg present, the following error will be reported:
Where Can I Get a printer.cfg?
- Open-source printer communities often provide a
printer.cfgfor their printers. Check the project's GitHub repository or ask on their Discord server. - Vendor-supplied configs — Many vendors add config files for their printers to the
Klipper GitHub repository. Look for
files matching your printer's name that start with
printer-. - Generic board templates — If you cannot find a fitting
printer.cfgor you replaced the printer board yourself, there are generic board templates in the Klipper repository to help you get started. These templates need adjustments to fit your printer setup (axis lengths, bed size, etc.). Look for files matching your board name that start withgeneric-.
Upload Your printer.cfg
To upload your printer.cfg, open the Machine page in Mainsail and click the upload-button, or simply drag and
drop the file into the config file panel. When the upload is complete, click on the Firmware Restart button to
restart Klipper and load the new config.
File Name
Make sure the file is named exactly printer.cfg. Only this name will be recognized by Klipper.
Klipper Firmware & Serial Path
Your printer board must be flashed with
Klipper firmware,
and the serial path to your printer board must be adjusted in the printer.cfg as described in the
Klipper documentation.
Mainsail-Specific Klipper Config
After uploading your printer.cfg and starting Klipper successfully, you will be confronted with a couple of warnings.
The Mainsail-specific configuration still needs to be added to your Klipper configuration (printer.cfg). This
configuration is provided as the mainsail.cfg, which is preinstalled on MainsailOS. You just need to include this file
in your printer.cfg by adding the following line at the top:
After adding this line, click SAVE & RESTART and the warnings should disappear.
More infos about mainsail.cfg
If you want to know more about what the mainsail.cfg does, check out the
mainsail.cfg documentation.
Finished 🎉
Congratulations! Mainsail is now ready to sail! Happy printing!