Control Settings
Open the Interface Settings by clicking the cogs icon in the top-right corner, then navigate to Control.
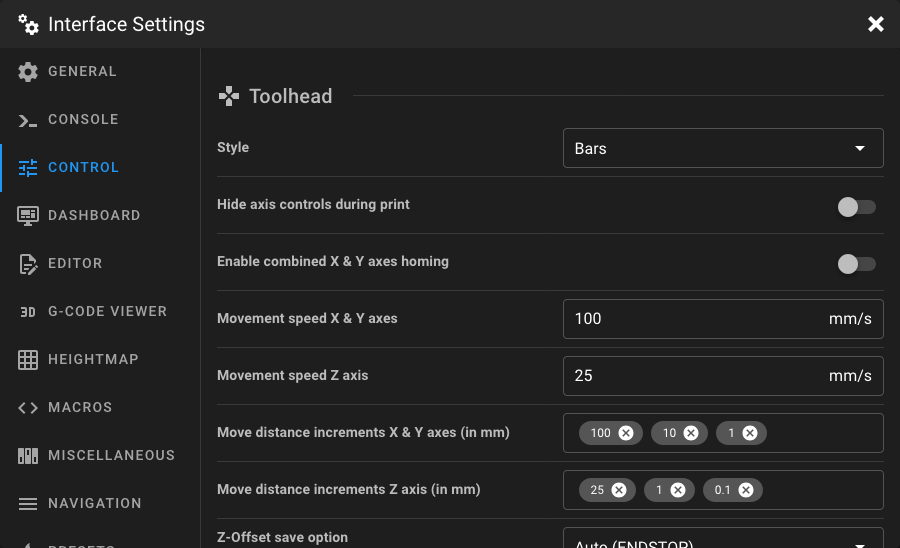
Toolhead
This section allows you to customize the toolhead panel on the Dashboard.
Style
Choose the appearance of the toolhead motion controls on the Dashboard.
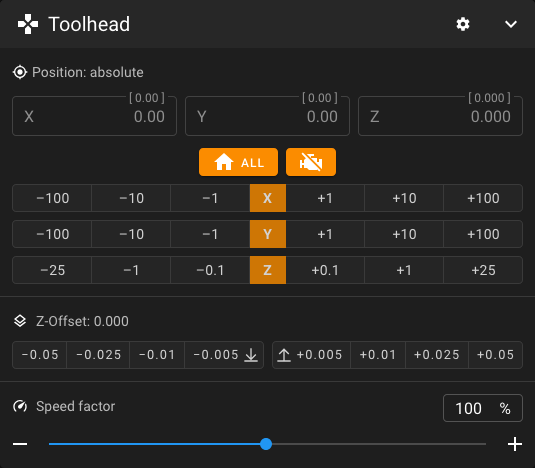
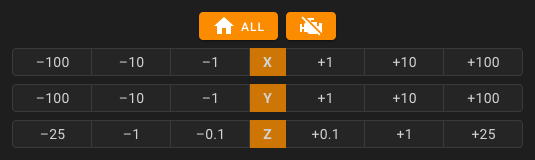
Simple horizontal bars for each axis.
Circular control pad for X/Y movement with a separate Z column.
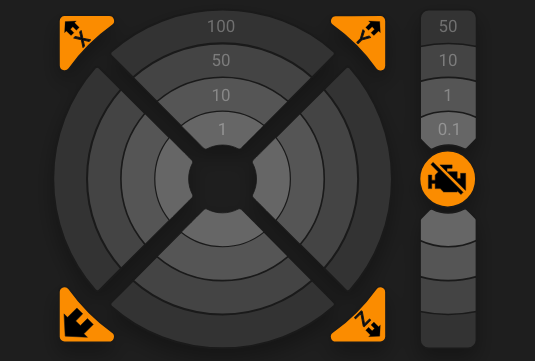
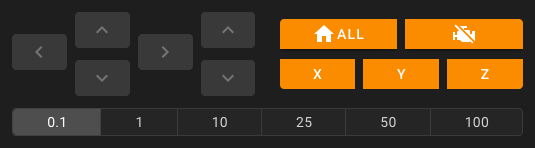
Cross-shaped directional pad for X/Y movement with a separate Z column.
Note
Some settings below are only available for specific control styles. The available move distance options change depending on the selected style.
Overwrite Action Button
Override the action button displayed in the center of the toolhead control. This option is only available when using the Circle or Cross style and when multiple actions are available.
| Option | Description |
|---|---|
| Motors off | Sends M84 to disable stepper motors. |
| Quad Gantry Level | Runs QUAD_GANTRY_LEVEL (only if configured in Klipper). |
| Z-Tilt Adjust | Runs Z_TILT_ADJUST (only if configured in Klipper). |
The default action is automatically selected based on your Klipper configuration.
Hide Axis Controls During Print
When enabled, the toolhead movement controls are hidden while a print is in progress. This prevents accidental movements during a print.
Enable Combined X & Y Axes Homing
When enabled, a single button homes both the X and Y axes together. When disabled, separate homing buttons are shown for each axis.
Invert X Axis Movement Direction
Inverts the direction of the X axis when moving through the interface.
Invert Y Axis Movement Direction
Inverts the direction of the Y axis when moving through the interface.
Invert Z Axis Movement Direction
Inverts the direction of the Z axis when moving through the interface. This is useful for printers where you prefer to think in terms of bed movement rather than toolhead movement. For example, on a CoreXY printer with this option enabled, moving Z in the negative direction sends the print bed down (away from the toolhead), instead of the toolhead moving down towards the bed.
Note
The invert axis options are only available when using the Circle or Cross style, and it only inverts the sending of movement commands from the interface. It does not change the actual printer configuration or the direction of movement when using physical controls or G-Code commands.
Movement Speed X & Y Axes
Set the movement speed (in mm/s) used when moving the X and Y axes through the toolhead controls. The value must be greater than 0.
Movement Speed Z Axis
Set the movement speed (in mm/s) used when moving the Z axis through the toolhead controls. The value must be greater than 0.
Move Distance Increments
Customize the selectable move distances (in mm) for the toolhead controls. The available options depend on the selected control style:
| Style | Fields | Max Values |
|---|---|---|
| Cross | Combined move distances for all axes | 9 |
| Circle | Separate X/Y and Z move distances | 4 each |
| Bars | Separate X/Y and Z move distances | 3 each |
Enter values and press enter to add them. You can remove values by clicking the × on each chip.
Z-Offset Save Option
Select which Klipper command is used when saving the Z-offset. This option is only available when an endstop pin is configured or a probe is configured in your Klipper setup (the available options depend on your configuration).
| Option | Description |
|---|---|
| Auto (default) | Automatically selects the best option based on your Klipper configuration. |
| ENDSTOP | Uses Z_OFFSET_APPLY_ENDSTOP to save the offset to the endstop. |
| PROBE | Uses Z_OFFSET_APPLY_PROBE to save the offset to the probe. |
Z-Offset Increments
Customize the selectable increment values (in mm) for adjusting the Z-offset. A maximum of 4 values are allowed.
Extruder
This section allows you to customize the extruder panel on the Dashboard.

Extrusion Amount Presets
Define preset filament lengths in mm for quick extrusion via the extruder control panel. A maximum of 5 values are recommended for best visibility.
Tip
You can also enter a custom extrusion amount directly in the extruder control panel on the Dashboard.
Extrusion Speed Presets
Define preset extrusion speeds in mm/s for the extruder control panel. A maximum of 5 values are recommended for best visibility. Once you have determined the maximum extrusion speed of your hotend, you may want to add it here.
Tip
You can also enter a custom extrusion speed directly in the extruder control panel on the Dashboard.
Show Estimated Extrusion Info
When enabled, the extruder control panel displays an estimation of the extrusion based on the selected extrusion amount and feedrate. Disable this option to hide the calculation.